Pie for Pi Day… Duh!

I’m appropriately re-launching the site for Pi Day. And obviously we’re going to have some pie.

DSC_0491

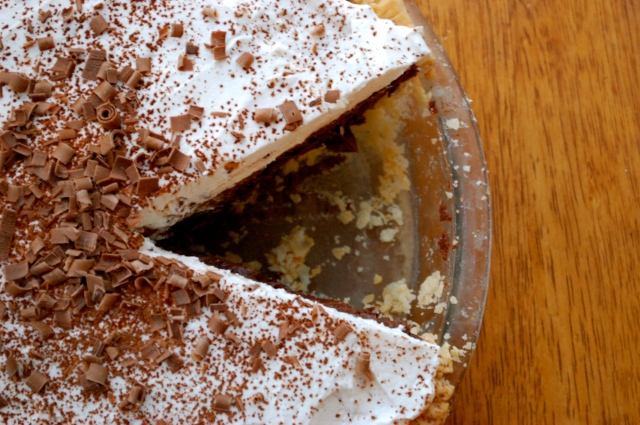
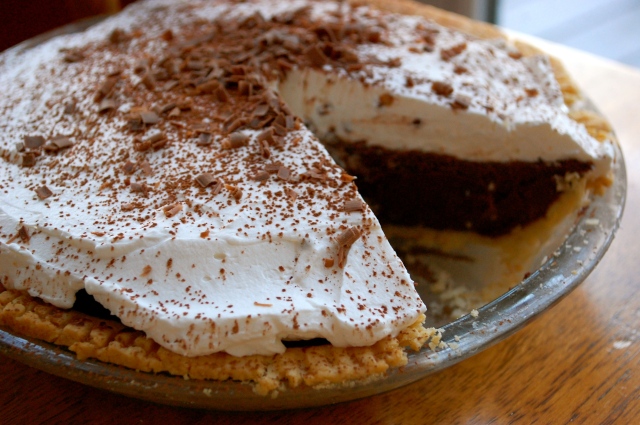
Chocolate cream pie is the underdog of pies, if you ask me. When you walk into the grocery store, it’s always wall to wall apple pie, cherry pie, lemon meringue pie, peach pie… you get it. And maybe wall to wall was slightly over the top. But, when was the last time you walked into a Shop Rite and saw a chocolate cream pie? You can’t remember, can you? Because it’s the forgotten pie.

DSC_0495Everyone loves an underdog. Rudy, Harry Potter, Forest Gump, Jack from Titanic, Chocolate Cream Pie. They all have one thing in common, they’re the schmuck you disregarded until one day, they were given their time to shine. I mean, things didn’t turn out to hot for our dear Jack, but everyone else made out pretty good. Today is the day that Chocolate Cream Pie enters its glory days.

DSC_0498

So let’s talk about this chocolate cream pie. First of all, I have 0 self control with chocolate. After some extensive online research, about 20 minutes, on the subject of chocolate cream pies, the dairy to chocolate ratio just didn’t sit well with me. 5-8 oz of chocolate to three cups dairy? Like really?

WHAT DO I WANT?

CHOCOLATE!

HOW DO I WANT IT?

BY THE GALLON!

DSC_0492

So the first thing I did was essentially double the amount of chocolate used. This is not a chocolate cream pie for the average Joe Schmoe. This is a super dark, super thick, super rich and creamy chocolate cream pie for the guy who isn’t afraid to face the fact that he may need to wear sweat pants for the next week after eating this pie. Because you probably will need to wear elastic for a while, so buckle up baby and grab a fork!

DSC_0503

Guh… Look at that. Let’s get cooking.

INGREDIENTS:

For the Crust:
3 Cups all purpose flour
1 Teaspoon salt
1 Cup unsalted butter, cold and cubed
1/2 Cup shortening
1 Egg
1 Tablespoon white vinegar
3-5 Tablespoons ice cold water
Aluminum foil
Pie weights, – Alternatives are rice and beans

For the Filling:
4 Large egg yolks
2/3 Cup sugar
1/3 Cup plus some extra, cornstarch
1 Teaspoon salt
1 1/2 Cups whole milk
1 1/2 Cups half and half
6 Oz bittersweet chocolate
6 Oz unsweetened chocolate
2 Tablespoons butter
1 Teaspoon vanilla extract
1 teaspoon instant espresso

For the Topping:
1 1/2 Cups heavy cream
2 Tablespoons powdered sugar
1 Teaspoon vanilla
2 Tablespoons cocoa powder, optional
Chocolate shavings, optional

DSC_0488

DIRECTIONS

For the Crust: Whisk the flour and salt together. Add in the cubed cold butter and shortening and work together with a pastry cutter, or hands, until it it looks like crumbles (like cornmeal). Then, add in an egg and vinegar and mix together until combined. Add in cold water one tablespoon at a time until the dough just comes together. This will make enough crust for two pies. You can split the dough in half and use the one and put the other in the freezer. It will last up to 6 months in a regular freezer and up to an eternity in the Yecco freezer. For immediate use, place the one dough in the  freezer for 20 minutes, or put in the fridge for at least an hour before using. Cold dough = flakey crust. Write that down.

Then, preheat the oven to 350 degrees fahrenheit. Roll out your dough and place it in a greased pie pan. So the crust doesn’t rise, you will need to weigh it down. I usually cover the part of the pie that is the bottom with aluminum foil and use pie weights to weigh it down. You can use uncooked rice or beans as a substitute. Just be sure to toss the rice and beans afterwards or save it to use as  pie weight again later. Bake for about  20 minutes. Then, remove the foil and pie weights and cook for another 10 minutes or so until it is just starting to turn golden in color.

For the Filling: In a stand up mixer, beat the egg yolks and sugar for about five minutes on medium-high. It will turn a light yellow color. Then, add in 1/3 cup cornstarch and beat for another 2 minutes. Set aside. In the mean time, in a small pot, heat up the half and half and whole milk in a sauce pan. Once it starts to warm up, add in the bittersweet and semi sweet chocolate  and whisk constantly until it melts. Once it melts, add in the vanilla, instant espresso, and salt. Mix until combined and remove from heat for a moment.

At this point you are going to tempter the egg mixture with the chocolate cream mixture. Turn the mixer on high and start to slowly add in about 1 cup of the chocolate cream mixture to the egg mixture. You want to add this very slowly because you don’t want to shock and cook the eggs by adding a whole lot of hot liquid at one time. This will turn your eggs  into scrambled chocolate covered eggs, which sounds totally gross even to this chocolate lover. Once the egg mixture has been tempered by the hot chocolate cream mixture, pour that back into the pot with the remaining chocolate cream mixture.

At this point,  you will want to constantly whisk the mixture until it thickens up. This will take about ten minutes. Once it has fully thickened, it will be like  super thick pudding. If you want a thicker custard, add more cornstarch one tablespoon at a time. Once the custard is to your desired consistency, add in  the butter, because you know, this custard can’t possibly get rich enough.

The most important part of a good custard is its consistency. NO LUMPS! Once the custard is thick, you will want to put it through a small mesh strainer at least 3 times. I usually do mine about 5 times while it is hot. Set to cool until room temperature for about 2 hours. Then push through the strainer another 2 times. Seriously. No lumps. Then pour your delicious, chocolate custard into the pie crust and refrigerate for at least 4 hours or overnight.

For the Topping: Once the pie is cool and set, start your whipped topping. Using an electric mixer, whisk the heavy cream on high until it turns thick. Then add in the vanilla extract and powdered sugar and stir until just combined. Don’t over mix or it will turn into butter! Then spread this light and airy whipped topping over your pie and sprinkle with cocoa powder and chocolate shavings.

DSC_0504This pie with some hot tea and Netflix is just calling my name.

Posted in Uncategorized | Leave a comment

Valentine’s Day M&M Cookies

Let’s talk cookies. And let’s make ’em Valentine’s Day themed.
DSC_0835
Valentine’s Day has a bad reputation. Forced Romance. Hallmark Holiday. Commercialized Idea of Love. As a (most-of-the-time) lady, I want to be wooed. All girls do. And the ones that don’t are lying. Let me tell you a little story…

Last Valentine’s Day, I told my boyfriend that I didn’t want anything because I thought Valentines Day was stupid. I’ve always thought it was a bit silly because, like I said, I want affection and attention year-round, not just on Valentines Day. Anyway, I asked for nothing and guess what I got? Nothing. And guess what I realized? It ain’t as stupid as I thought. I was not a happy gal! But at the same time, I asked for it!  Moral of the story, ladies, you really do care about Valentines Day. Men, just go out and buy some flowers, will ya? They’re twelve bucks at the grocery store and just as nice as a florist.

Also, if you say you want nothing, you will get nothing and you won’t be happy about it.

DSC_0826

Valentine’s Day is one of the most divided topics, I think, in our society. People get so heated over the holiday. I got into a fiery conversation about it yesterday. Some men feel pressure because society has built it up to be the biggest day for romance of the year. Also because of how commercialized the day has become, some women can have high expectations about what they want for the holiday, thus putting way too much pressure on their significant other. Neither of these kind of people will enjoy Valentine’s Day acting like that. And to these people I say grow up because life ain’t no Disney Princess movie, get some take out, and just enough eachother’s company.

Some people don’t like the holiday because it can be viewed as a day where a women relies solely on a man for happiness. Some ladies are like, I can buy my own chocolate and bake my own M&M cookies.  I don’t need a maaaaaaan to do it. And some men are like, I like an independent women who doesn’t rely on me as her only source of happiness. Because of that I don’t believe  in Valentine’s Day. To those men, I say shoo, shoo! It ain’t about that! Wanting to be all sappy and love-dovey can have absolutely nothing to do with “relying on a man for a source of happiness.” And to those ladies, I say refer to my story above. Believe me, you’d rather have someone you care about bake you some cookies and eat them together rather than sit alone and bitter on the couch, easily downing a dozen while watching a Law & Order SVU Marathon.

Though I do think it is a silly holiday, I also think it’s a fun holiday! I love how everything is pink and red and glittery. I love how food is dyed cool colors and come in heart-shapes. I l0ve how it is really just about love. It doesn’t have to be love for a husband, wife, boyfriend, girlfriend. It can be love you feel for a friend, a family member, your dog, for God’s sake. But most of all, I love the witty valentines

photo1

Valentine’s day isn’t about flowers, chocolates, and giant stuffed animals. It was initially a day to celebrate Saint Valentinus, who was imprisoned for performing weddings for soldiers, who were forbidden to marry. I mean, how cute is that? It wasn’t until Geoffrey Chaucer came along that it became associated lavish gestures of romance.

So, if you want someone to blame for your Valentine’s Day troubles, blame Chaucer. He’s the real perp here.

DSC_0834

So what does this all have to do with cookies? This year, forego the flowers, jewelry, and chocolate, and give something special to someone even more special. I think that homemade gifts are the best way to express how much you care about someone. And if it involves food, even better.

DSC_0837

Valentine’s Day M&M Cookies
Based off the Infamous Jacques Torres Chocolate Chip Cookie Recipe
Makes 36 cookies

Ingredients:
2 Cups minus 1 Tablespoons cake flour
1 2/3 Cup bread flour
1 1/2 Teaspoons baking powder
1 1/4 Teaspoons baking soda
1 1/2 Teaspoons salt
1 1/4 Cups butter, room temperature
1 1/4 Cups light brown sugar, packed
1 Cup plus 2 Tablespoons white sugar
2 Large eggs, room temperature
2 Teaspoons vanilla extract
1 Cup M&M’s
1 Cup Peanut Butter M&M’s (or 2 Cups regular M&M’s)

Directions: Sift together the flours, baking powder, baking soda, and salt and set aside. In a mixing bowl, cream together the butter and sugars until fluffy, about 3 minutes. Then add in the eggs, one at a time. Once the eggs are incorporated, mix in the vanilla extract. Slowly add the dry ingredients to the wet ingredients. When the dough is just coming together, fold in the M&M’s and mix until all ingredients are incorporated.
Refrigerate the dough for at least 24 hours. Refrigerating the dough will help the cookies keep their shape when they’re baked. This also ensures a soft, chewer cookie that is just crisp enough around the edges. The perfect cookie. After 24 hours, preheat the oven to 350 degrees fahrenheit.  I used a tablespoons melon baller to scoop out even sized cookies. Bake for 10-12 minutes. For extra soft cookies, cook for 9 minutes, until the edges are just firm enough. Let cool and eat up!
DSC_0840

Posted in Uncategorized | 1 Comment

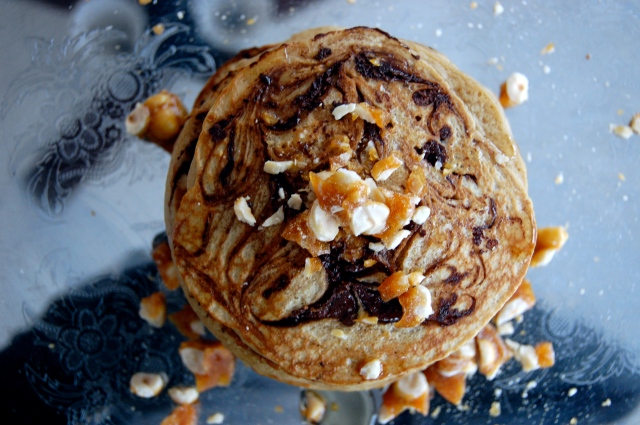
Hazelnut-Chocolate Swirl Pancakes with Hazelnut Brittle

When I was at the gym this morning, naturally I was thinking about pancakes. A big, fluffy, sweet pile of pancakes. It’s one of my favorite foods for obvious reasons; it’s socially acceptable cake for breakfast, duh.

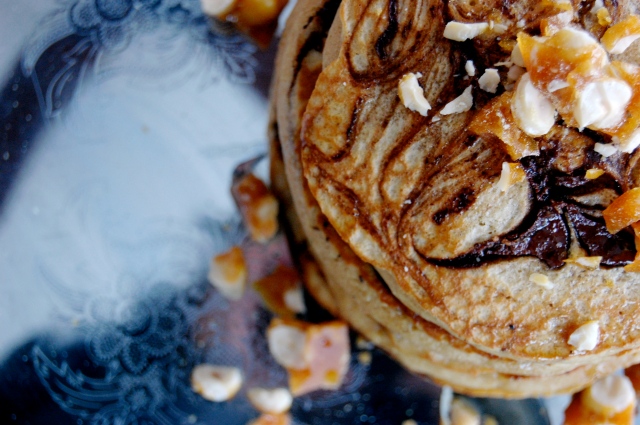
DSC_0803 So after mile one on the treadmill, I decided that I wanted to make hazelnut pancakes this morning. And in order to do that, I needed to run at least another four more miles. The entire time I ran, I just imagined these chocolate swirled, hazelnutty, fluffy breakfast pillows topped with sweet little hazelnut crunchies. In my mind, exercising neutralizes all the sugar I pump into my body daily.

DSC_0810 Michelle Obama, pipe down, I don’t actually gorge on pancakes every morning. Though I do picture donuts and cake and burritos when I’m exercising…

Whatever motivates me… am I right??

DSC_0815

Hanzelnut-Chocolate Swirl Pancakes w/ Hazelnut Brittle
Makes 6 Pancakes

** Tip: Make sure your eggs, butter, and milk, and room temperature. Doing this helps the pancakes come out fluffy.

Ingredients (For the Pancakes):
1/3 Cup hazelnuts, ground
2/3 Cup pastry flour (a.k.a. cake flour)
2 Teaspoons baking powder
1/2 Teaspoon salt
2 Tablespoons white sugar
3 Tablespoons butter
1/2 Cup whole milk
2 Eggs
1 Teaspoon vanilla extract
1/2 Teaspoon hazelnut extract
1/2 Teaspoon instant espresso
1/4 Cup chocolate chips, melted

Ingredients (for the Hazenut Brittle):
1/2 Cup white sugar
1/3 Cup whole hazelnuts

Directions: In a small saucepan, melt the butter on medium low heat until it starts to turn brown. It will bubble up a lot right before it turns brown. Then, let cool.  While it is cooling, begin on the brittle

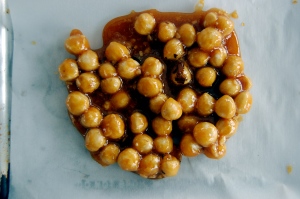
For the Hazelnut Brittle, start by lining a plate with parchment paper. Heat the sugar in a saucepan on medium low. While the sugar is melting, do not touch it! It will smoke a little bit, but let it do its thing. If you play with it, it will get clumpy. If you feel the need to mix things around, just kind of shimmy the pan around. Once melted, it will turn a dark caramel color. At this point, add in the Hazelnuts and coat with the melted sugar. Then, pour the mixture onto the parchment paper and allow to cool in the fridge until it is completely hardened, about 15 minutes. Then, cover the brittle with a paper towel and smash with a meat tenderizer, rolling pin, or whatever you got that is hard, until it forms small pieces.

DSC_0799   DSC_0801

Back to the Pancakes: In a food processor, grind the hazelnuts until it forms a flour. In a medium size bowl, mix together the hazelnut flour, pastry flour, baking powder, sugar, and salt. In a measuring cup, whisk together the milk, eggs, instant espresso, vanilla extract, hazelnut extract, and butter. If all your wet ingredients aren’t at room temperature, your butter will clump up when it is added to the milk. Once well mixed, incorporate into the dry ingredients and whisk together until just combined. Using a 1/3 Cup measurer, pour the batter onto a medium heat and buttered  griddle. Drizzle the melted chocolate onto the pancakes and use a toothpick to make swirls, like this:
DSC_0797
Let cook on the first side for 3 minutes, until it starts to rise and get bubbly. Then, flip over and allow to cook for another minute. The chocolate will burn easily so keep an eye on the pancakes. To avoid burning the chocolate, wipe the griddle clean and apply fresh butter after every pancake. Top with syrup and some brittle, eat ’em up, and head on over to the gym to work it all off!

DSC_0806

Go on… take ’em all in

DSC_0813 These glorious and fluffy pancake angels… from my parent’s kitchen to yours, since I still live at home and don’t have a kitchen of my own …. 24 isn’t all it’s cracked up to be. Which explains all the butter and booze in my cooking…

I’ll just end it there before things get even more pathetic.

Yes. Pancakes. Make then.

Posted in Uncategorized | 2 Comments

Toasted Almond Hot Cocoa

I’ve been testing out some new recipes over the last month and improving some existing ones. Remember those Bailey’s Hot Cocoa Cupcakes? They’re new and improved and even more boozy. But I’m saving that for later.

Today is, yet another, one of my favorite kinds of days-a snow day! I mean, I will be 85, working at the library and still get excited over a snow day. What’s more snow day appropriate than some hot cocoa… with a little bit of alcohol in it. Okay a lot a bit of alcohol in it.

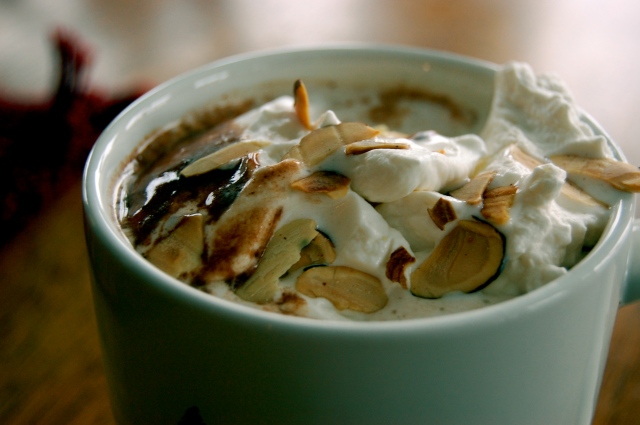
DSC_0754 As I drove home from work this morning, snow day remember, all I could think about was pouring myself a warm, smooth mug of toasted almond hot cocoa. Just slip into some sweat pants, put on some Food Network, and sip on the good stuff. That’s life right there.

DSC_0755 Now I did this version of hot cocoa a little different. Starting with the milk, I used vanilla flavored almond milk. But of course, you can use 2% or whatever is in your fridge. I’m very weird with milk and can’t stand the texture- yes, there is a texture to milk and it makes my skin crawl! But the almond milk is A-okay by me. I also used chocolate chips instead of either a chocolate syrup or cocoa powder, which is what I usually use. I figure, the sweat pants are already on-bring on the rich chocolate goodness!

You can leave the amaretto out so this is a kid-friendly recipe. With the booze and without the booze, it’s delicious.

DSC_0757

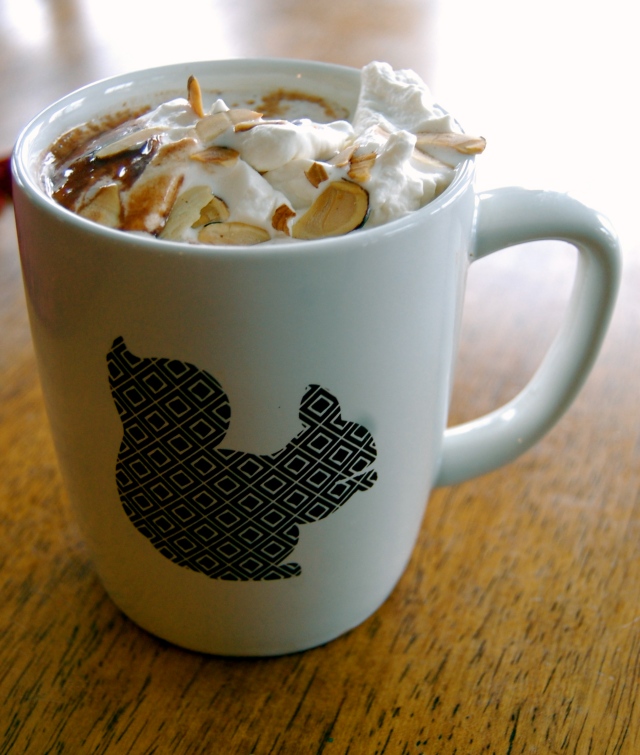
P.S. you like this mug? Almonds-nuts-squirrels- get it? I thought it was clever.

Toasted Almond Hot Cocoa
1 Serving

Ingredients:
1 Cup of vanilla flavored almond milk
1 1/2 Tablespoon semi-sweet chocolate chips
1/8 Teaspoon almond extract
1 oz Amaretto
1 Tablespoon sliced almonds
1/4 Teaspoon  vanilla extract
3 Teaspoons sugar (2 for the hot cocoa, 1 for the whipped cream topping)
1/4 Cup heavy whipping cream

Directions: In a sauce pan, heat on low heat the milk, chocolate chips, almond extract, amaretto, and 2 teaspoons of sugar. Bring to a simmer and remove from heat. In a small pan, toast the almonds until they just turn golden brown, about 2-3 minutes. For the whipped cream, chill a medium sized bowl for 2 minutes. Then, using an electric hand mixer, mix together the heavy cream, vanilla extract, and 1 teaspoon sugar until it forms a whipped cream, about 1-2 minutes.

To assemble your toasted almond hot cocoa, pour into a mug, top with whipped cream, and sprinkle with the toasted almonds.

You will not regret this.

I also apologize in advance for any hot chocolate addictions this may caused.

DSC_0756

Posted in Uncategorized | 1 Comment

Christmas Swirl Sugar Cookies

I love me a Snow Day. Even though I first drove all the way to Philly, hiked through the streets in the near-blizzard, only to learn that they were closing the office- I’d do it again to be sitting here on the couch at 11 a.m. on a Tuesday. The snow is actually a perfect backdrop for today’s recipe.

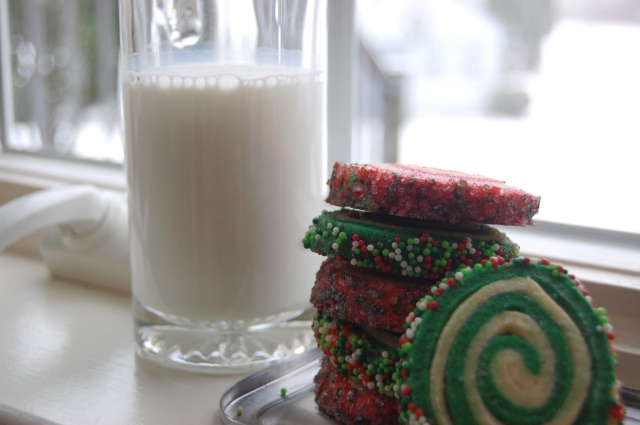
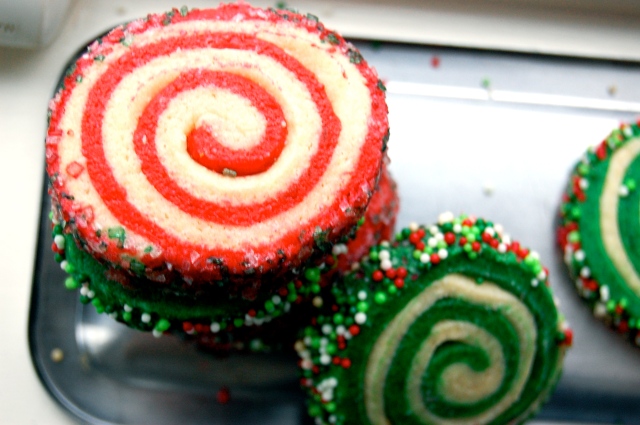
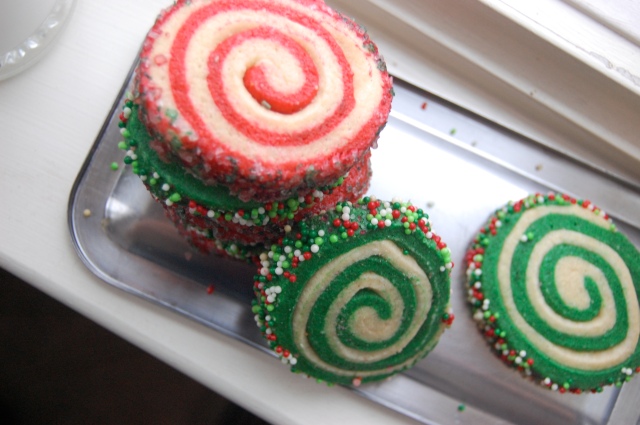
DSC_0563 Now what is the Holiday Season without Christmas cookies? Sweet, buttery, perfection.  I initially saw these “Swirl Sugar Cookies” on Pinterest via blogger Amber of the Salt Tree. She created these funky  blue and rainbow Swirl Sugar Cookies. They were so cute,  so I figured, why not change them up and make them for Christmas? Easy, cute, and don’t the green one’s remind you of little Christmas Elf ears?

DSC_0597 Elf ears got me thinking- since it is Christmas Season, the prime time for storytelling, what Holiday stories are there about elves? Figure, it’s been a while since I wrote about a book (cough cough, mom & dad, thanks for consistently reminding me of this, cough cough).

DSC_0580

Nope, not doing the Elf of the Shelf or Elf a la Will Farrell. No, not something from your kids’ bookshelf. Two words: David Sedaris. He is one of my all-time favorite writers because he is dark, sarcastic, and witty. I was first introduced to Sedaris in my college Intro to Journalism class. It was right before we let out for winter break and my professor played for us Sedaris’ story, “Santaland Diaries” on NPR. As Sedaris read his short story about “Crumpet the Elf’s” traumatic experience during the Christmas Season working at the Macy’s on 5th Ave, NYC,  I couldn’t help but appreciate his candid recollection of the REAL Christmas experience.

DSC_0585

So whether this is Sedaris’ actual experience or someone else’s experience that he wrote about, it is still the best depiction of the Christmas season. It’s not all mistletoes and hot chocolate this time of year. Poor “Crumpet” has to endure weeks of “Elf Training” before the Holiday Season kicks off at Macy’s. Not just any Macy’s, the most pretentious Macy’s in the U.S.- Macy’s on 5th Avenue in Manhattan. There are different kinds of elves: Greeter Eleves, Helper Elves, Exist Elves, Photo Elves. But regardless of the kind of Elf they are, they all encounter the same Christmas offenders: the overwhelmed Christmas shopper. And “Crumpet” takes you on that Christmas adventure of what it’s like to work as an Elf in one of the busiest Department stores in the country, during the most expensive and hectic times of the year.

DSC_0592

You know, all these Christmas stories are too sweet, too nice, and completely fake. Let’s be real. Christmas, though a lovely, joyous time of the year, is one of the most overwhelming times of the year. There’s anxiety, financial difficulties, high expectations, conflict with shoppers- don’t try and tell me during the Holiday season you never got out of your car when someone at the Mall stole your parking spot after you drove around for 45 minutes. Sedaris paints a real picture of what happens when your Holiday Spirit gets a little soiled.

I enjoy this sarcastic and dark sense of humor Sedaris has about Christmas, particularly Christmas shopping. Sometimes, your Holiday season isn’t going to be perfect. Sometimes, you’re just not going to get the latest IPad Air, despite how long you waited outside of Target on Thanksgiving. Your Christmas cookies are going to burn, maybe you’ll start a little grease fire cooking Christmas Eve dinner. And that’s fine. There’s a little “Crumpet the Elf” inside of all of us. And “Crumpet” (and Sedaris) reminds us that, it is just A-Okay to be a little bit of a Grinch or Mr. Scrooge. We all do it.

DSC_0587

Christmas Swirl Sugar Cookies

Ingredients:

3 Cups flour

3/4 Teaspoon baking powder

1/4 Teaspoon baking soda

1/2 Teaspoon salt

1 Cup butter, softened

1 1/2 Cups Sugar

2 Eggs, room temperature

1 1/2 Teaspoons vanilla extract

1 Teaspoon red gel food coloring, plus more for desired color

1 Teaspoon green gel food coloring, plus more for desired color

1/4 Tablespoon water

1/3 Cup Christmas non-peril sprinkes

1/3 Cup Christmas sugar sprinkles

Directions: 

1. In a mixer, beat together your butter and sugar for 2-3 minutes until fluffy. Then add in your eggs and vanilla extract and mix until combined.

2. In a separate bowl, sift together the flour, baking soda, baking powder, and salt. On medium low speed, slowly add the dry ingredients to the butter mixture.

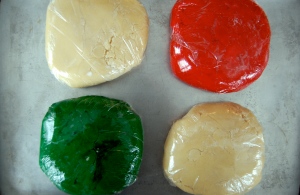
3. Once the dough just comes together, remove and cut into four equal sized sections of dough. Place two sections of dough aside, as these will remain white.

4. Add one of the remaining section back to the mixer add your green dye. Add more until you’ve reached your desired color. The dough will be very gooey at this point, but remove it from the mixer and place aside. Clean the mixing bowl and paddle and do the same thing to the remaining dough section, but dye it red.  Your will have this:

DSC_0568   DSC_0572

5. Wrap your sough in saran wrap and refrigerate for two hours. Any less time and your dough may be too soft to work with it. Then, remove from fridge and roll out one of the white dough balls on a floured surface until it is around 1/4 of an inch thick. Try to get it into the shape of a rectangle. Set this aside. Then, take one of your colored dough balls and roll it out of a flowered surface. Brush the colored dough surface carefully with a little bit of water. Then, take the white dough that has been rolled out, and place it on top of the colored dough. Cut off the rough edges to it makes a rectangle. It will look like this:

DSC_0575

6. Gently brush the white dough surface with a very little but of water. Then jelly roll the dough until it looks like a long log. Repeat this for the other color dough.

DSC_0577   DSC_0579

7. Wrap in Saran wrap and refrigerate over night, or up to 24 hours. When you are ready to bake, preheat the oven to 350 degrees fahrenheit. Slice the cookies into equal slices, about 3/4 of an inch in thickness. I like mine a little thicker, but you can do it 1/2 an inch thick if you like. Then, take a paper towel and soak it in water. Gently moisten the edges of the cookies in water and then roll the edges into the sprinkles. The water will help the sprinkles stick to the cookies.

Tip: Make sure you are always working with cold dough when you bake sugar cookies. When the dough is soft, or room temperature, it will cause the cookies to overly spread and become thin when they bake in the oven. If you put cold dough in the oven, it will ensure that the cookies hold their shape. So remember, while your cookies are baking in the oven, always refrigerate the uncooked dough. 

8. Bake the cookies on a buttered cookie sheet for 12-15 minutes until cooked. Let cool. Serve to santa with a glass of milk.

DSC_0588

Posted in Uncategorized | 3 Comments

Apple Cider Chicken with Mashed Parsnips & Potatoes

Sundays should just be called Doomsday. It’s 2 p.m. on a Sunday and I am in my typical Sunday shutdown. I will spend the next 16 hours until my alarm goes off, moping around the house, lashing out at people for no reason, complaining about Monday. I’ve acted like this since kindergarden. Proof that you can’t teach an old dog new tricks.

DSC_0364 Despite my Sunday sulking, I did manage to perk up for a little bit to bring you this delicious end of fall, start of winter recipe: Apple Cider Chicken with Mashed Parsnips & Potatoes. The chicken is saturated in that great fall cider flavor with some not so subtle hints of rosemary and thyme, my favorite herbs. I tend to go overboard with the rosemary

DSC_0391 Parsnips are weird little guys. They look like some unidentifiable root vegetable, but taste like carrots. Very Twilight Zone. Mixed with potatoes, the parsnips, which could have taken a terrible baby food turn, are creamy and rich due to all the starches.

Let’s get started

Apple Cider Chicken with Mashed Parsnips & Potatoes

For the Chicken
1 Whole chicken, broken down- 2 breasts, 2 thighs, and 2 legs. You could use all chicken breasts, I just like using the bones since it adds more flavor
2 3/4 Cups Apple Cider
8 oz. Whole and peeled pearl onions
3 Sprigs of fresh thyme
3 Sprigs of fresh rosemary
2 Cloves of garlic, minced
1/4 Cup olive oil, plus extra to sear the chicken
2 Tablespoons apple cider vinegar
1 Tablespoon whole grain dijon mustard
1 Bay leaf
1 Teaspoon salt
1/2 Teaspoon pepper
2 Large red apples, sliced

For the Mashed Parsnips and Potatoes
4 Large parsnips
3 Large redskin potatoes (you can use whatever you like, I like the pops of the red skin)
1/2 Cup sour cream
1/2 Cup butter
1/4 Cup whole milk, add more based on your desired consistency
Salt to taste
Pepper to taste

Directions

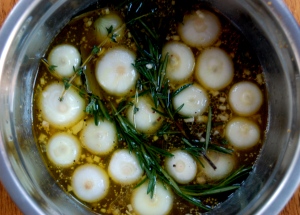
For the Chicken: Trim the fat off of your chicken and cut big slits in the chicken so the marinade can soak in.  Then, set side. In a large container, mix together the apple cider, olive oil, apple cider vinegar, dijon mustard, garlic, salt, and pepper. Then, add in the pearl onions, rosemary, and bay leaf. Add your chicken and let it marinate in the fridge for at least 2 hours, or up to 24 hours. I soaked mine for 6 hours and it was fabulous.

DSC_0342   DSC_0354

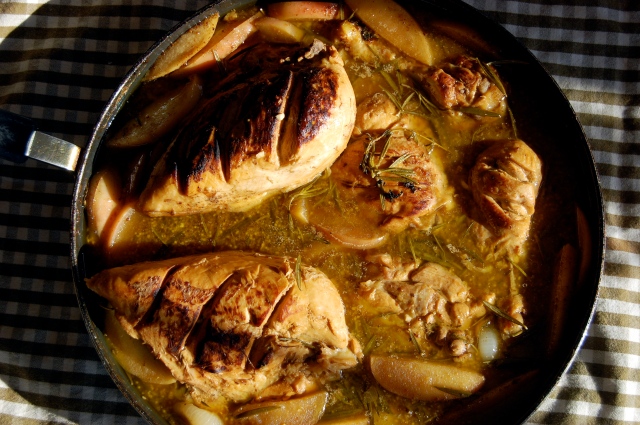
After your chicken has marinated, remove chicken from marinade and let it get to room temperature for an hour, this will help it sear better. Heat some olive oil in a large pan and sear the chicken on both sides until it is golden brown and beautiful. Once seared, pour your marinade into the pan and turn the meat to low. At this time, add your apple slices into the pan. You can add in more rosemary or thyme at this time too,  I did. Place a lid over your chicken. Every 15 minutes, flip the chicken over so each sides gets time in the apple cider jacuzzi that you have created. While the chicken is doing its thing, begin progress on the mashed parsnips and potatoes. Cook the chicken for 60-90 minutes, until the chicken is literally falling off the bone. So succulent and rich.

DSC_0373 For the Mashed Parsnips & Potatoes: Peel your parsnips. Cut the parsnips and potatoes into equal sized cubes. Place your parsnips and potatoes into a large pot and cover with water until the vegetables are just covered. Cook for about 30-40 minutes until your parsnips and potatoes are tender. Then, drain the liquid and put your vegetables back into the pot. Add the sour cream, butter, milk, salt and pepper to taste and mash until it is to your desired consistence. I made mine on the chunky side.

DSC_0362   DSC_0396

To plate, place a nice spoonful of your mashed parsnips and potatoes onto your plate. Put your tender chicken on top and smother the top with the apple cider gravy, apple slices, pearl onions, and fragrant rosemary and thyme.

DSC_0385 The chicken is sweet and savory and marries perfectly with the apples that are soft and taste like candy, and the parsnips cut the sweetness with a wonderful earthy flavor and creamy texture. Ugh, my mouth is watering.

It’s snowing here in New Jersey, our first real snow in two years. Nothing warms the soul and belly like some slow cooked chicken and earthy vegetables.

DSC_0375

Posted in Uncategorized | 1 Comment

Pecan Pie & New Reads

Of all the pies in all the world, the one I have yet to have eaten or baked until last week was the Pecan Pie. It’s been a rough life, clearly.

DSC_0433 With Thanksgiving just a few weeks away, I figure I best catch up to all the other food bloggers out there and post holiday recipes- starting with this chewy, sugary treat inspired by a recipe via- my girl- Ree Drummond, The Pioneer Woman.

When I thought of Pecan Pie, I thought of three things: the South, cavities, and ain’t that pie hard to make? Well, I was wrong about one of those things. Yes, this pie originated in the deep south, we’re talking Louisiana deep. Yes, there’s a TON of sugar in this so you’re gonna need to brush and floss, twice. And no, this pie is not hard at all to make. It’s easy and pie…..

DSC_0440You may notice something a little funny about this photo. Well two little funny things. Yes, those are two uncooked pecans that I’ve placed “inconspicuously” to cover a gaping hole in my pie. Why? Because I have a little friend who wanted a midnight snack. My friend is named Mickey, Mickey Mouse. Or should I say he was named Mickey Mouse.

Don’t mess with a girl and her pie!

I left my beautiful pie on the counter to coo, completely forgetting that we had a mouse loose in the house. The next day two pecans were gone. I pointed fingers at everyone in the house and they all denied it. And then, my mom found two mouse droppings next to the pie. Yep, a mouse had first dibs, but by the time we realized that there were dirty mouse paws all over the cake, it was too late. We were already half a pie down.

DSC_0446 We got him though! Got that mouse real good. Anyway, this pie is easy to make, just make sure you cover it from unwanted guests.

Pecan Pie

Ingredients for the Crust

You will have extra pie dough, but you can freeze it in the freezer for up to 6 months and pop it out into the fridge one day before using.

1 1/2 Cups shortening
3 Cups Flour
1 Egg
5 Tablespoons ice cold water
1 Teaspoon salt
1 Tablespoon white vinegar

Ingredients for the Pie
1 Cup white Sugar
3 Tablespoons brown sugar
1/2 Teaspoon salt
1/4 Teaspoon cinnamon
Pinch nutmeg
1 Cup light corn syrup
1 Teaspoon vanilla extract
1/3 Cup melted butter, cooled slightly
3 Eggs
1 Tablespoon maple syrup
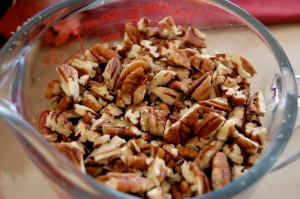
1 1/2 Cups chopped pecans
1 Cup, or so, of whole pecans to decorate the top of the pie

Directions

For the Crust: To the flour, add the salt, and shortening and cut with a pastry cutter, or use your hands, until small beads form. In a small bowl, beat an egg with 5 Tablespoons of water and the white vinegar. Add this to the flour mixture and kneed until it forms a ball. It will be softer. Cover in saran wrap and put in the freezer for 30 minutes. After 30 minutes, roll the dough out onto a floured surface to about 1/4 inch thickness. Butter a pie pan and place the rolled pie crust down. Cut around the edges of the pan to make it look nice. Freeze any extra pie crust. Put the pie crust in the fridge for now.

For the Filling: Melt your butter and set aside for 5 minutes to cool down slightly. In a medium sized bowl, mix together the white sugar, brown sugar, salt corn syrup and butter. Beat the eggs and add it to the sugar mixture. Chop one and a half cups of pecans and add it to the shell of the pie.

DSC_0403   DSC_0405

Then, pour the sugar mixture over the pecans, setting aside 1/2 of the mixture. Let it sit for about two minutes, as the pecans will begin to float to the surface.

DSC_0421   DSC_0423

DSC_0424

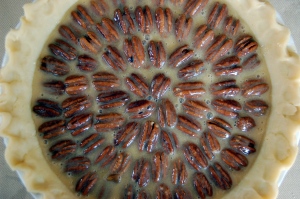
Then arrange the whole pecans on the top of the pie and cover with the remaining sugar mixture.

DSC_0430   DSC_0432

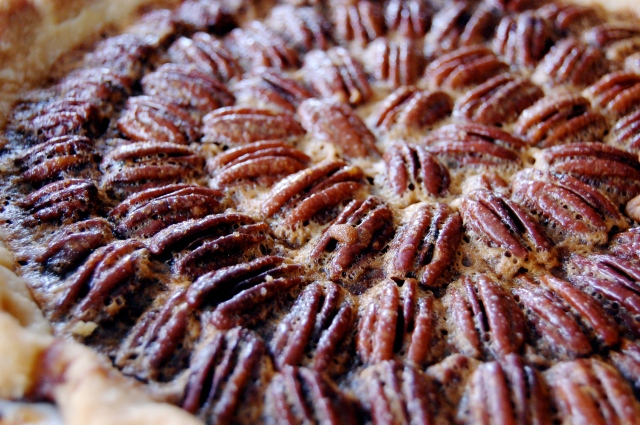
Bake in a 350 degree oven for 30-40 minutes, just until the center doesn’t jiggle. The baking time varies, but if you are unsure, keep checking on it every 5-10 minutes until the center doesn’t jiggle. Then, turn the oven off and crack the oven door open just slightly. Let the pie sit in the oven for 20 minutes. Then remove from oven and let get room temperature, about 1 hour. Refrigerate overnight.

DSC_0437 It’s been a few weeks since I’ve talked books at all. Currently, I’m reading Into the Beautiful North by Luis Alberto Urrea. This novel is about a young girl’s journey to repopulate her small Mexican village, which has been taken over by the los banditos, by crossing the boarder into the United States and bringing back the men who left her village years ago. During her journey, she plans to bring back her father who abandoned her long ago.

I am about half-way through. Initially, I was drawn to the book because of the story of this young girl who is up against the odds and has no clue how difficult crossing the boarder into the U.S. actually is. Let alone, traveling through the U.S. to find her father, which all she knows about him is that he is in a small town in the midwest.

There are several disappointments from this novel, however, and it pains me to say it because the story line is so captivating and the character Nayeli is very interested. But I’ll keep you waiting until next week.

Until then, make a pie why don’t cha?

DSC_0444

Posted in Uncategorized | Leave a comment

Pumpkin & Sage Ravioli in What Else- A Brown Butter Sauce

This post is all about why it is super important to read directions and recipes ALL THE WAY THROUGH before starting. Or else, you could end up with 13 pounds of pumpkin worth of pumpkin puree…. I mean there literally isn’t enough days in the Fall for me to make a pumpkin-flavored snack every day.

DSC_0319

Like most girls, I look forward to fall for the following reasons: Scarves make my giddy, Sweatshirts cozy my heart, Fall leaves are one of the most beautiful things, and duh- Pumpkin Spice Lattes are back at Starbucks! Hu-Low! L.L.P.S- Ladies Love Pumpkin Stuff. I became obsessed over the last few weeks over pumpkin ravioli and of course I wanted to make the whole shabang from scratch. So I did some research and came across a Martha Stewart recipe that I decided I would use as my starting point.

DSC_0335

I want you all to see what I see. This is the link to the Martha recipe. Does that look like 1, 3 pound pumpkin or a 13 pound pumpkin? Because yours truly read it as 13…. I’ve got a freezer full of pumpkin puree. I mean, I could eat pumpkin all day, but December 1 ends pumpkin season and starts peppermint & s’more season and there just ain’t enough time.

DSC_0248

Anyway, the Pumpkin Ravioli were a success. This may shock you, but when I try the DIY thing with food, it typically ends in a total disaster. Yes it is easier to but a can of pumpkin puree, but there’s just something about a fresh pumpkin. And as for the homemade pasta- I mean, talk about a party trick! And it’s super simple! Of course, you can buy pre-made pasta sheets too.

Since there are many steps, lets get started

Pumpkin & Sage Ravioli
Makes 35 ravioli

What You Need:
Pasta Machine- a rolling pin will work, but be warned, you will have an intense arm work-out
Ravioli cutter- you can also use  a pizza cutter to form the square shapes and then close the ravioli using a fork

Ingredients for the Ravioli Filling
1- 3 pound pumpkin or 1 1/2 Cups pumpkin puree
drizzle olive oil,
salt to taste
pepper to taste
1/2 Cup ricotta cheese
1/4 Cup grated parmesan cheese
1/3 Cup panko bread crumbs
1 Egg
1 Shallot, chopped,
1/4 teaspoon nutmeg
Pinch cinnamon
2 cloves garlic, roasted in the oven until golden brown (Roast the entire bulb, as it will be used in the brown butter sage sauce.)
5 Sage leaves, julienned

Ingredients for the Pasta Sheets
(If you are making fresh pasta, otherwise you will be 1 1/2 pounds of pasta sheets)
3 1/4 Cups semolina flour
4 Eggs
4 Tablespoon olive oil
1/3-1/2 Cup of water

Ingredients for Brown Butter Sage Sauce
1/3 Cup pumpkin seeds, optional (can also use pine nuts)
6 slices of bacon
1/2 Cup butter
3 Tablespoons fresh sage leaves, chopped
Salt to Taste
Pepper to Taste
3/4 Cup chicken stock
1/4 Cup craisens

Directions:

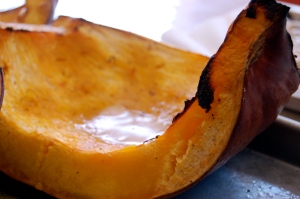
For the Ravioli Filling: If you are choosing to make your pumpkin puree, start by slicing a 3 pound pumpkin in half, drizzling it with olive oil, salt, and pepper,  and roasting in a 400 degree fahrenheit oven to 60 minutes or until it is  fork tender. This is a good time to roast an entire bulb of garlic for around 25-30 minutes. It will be used in the filling and in the brown butter sauce.

Since I bought a 13 pound pumpkin…

DSC_0263  DSC_0266 

Once the pumpkin is roasted and cooled, puree in a food processor until it looks like this:

DSC_0269

Once the puree is cooled, add the ricotta cheese, parmesan cheese, egg, panko bread crumbs, shallot, nutmeg, cinnamon, garlic, sage leaves, and salt and pepper to taste. Combine until well mixed. Then, let set in the fridge for at least one hour.

For the Pasta Sheets: While the pumpkin is roasting, prepare a clean surface to begin making the pasta dough. Pour your semolina flour into the shape of a volcano. In the center dome, stir your eggs and olive oil. Then, slowly begin incorporating the flour into the center of the “volcano.” If it is too dry, add water a little bit as a time until it all comes together. The dough will feel rough at first. Kneed the dough for 5 minutes to soften it up. When the dough is ready, it will be smooth. Then cover and place in a cool, dark place for at least one hour.

When it’s been an hour. Separate the dough into baseball size balls.

DSC_0277  DSC_0279

Then flatten it into disks and place into the pasta machine in the number 2 setting. Then, run it through the machine again in the number 5 setting. If you are rolling your dough out, I’m sure you’ve eaten ravioli and I trust your judgement. ** This is a safe space, we do not judge, just eat. But in all seriousness, roll the dough out until it is about 1/4 inch thick.

DSC_0283  DSC_0285

Lay the sheet flat and mark the center, as it is where you will fold the dough over. Using a ravioli cutter, create a ravioli blueprint on half of the pasta sheet by gently pressing the outline of the ravioli into the dough. Then, fill the center of your marking with a tablespoon of the pumpkin filling. Fold the half of the pasta sheet over top and use the pasta ravioli cutter to cut out your ravioli.

DSC_0299DSC_0300

If you don’t have a ravioli cutter, you can use a cup to cut out little circles. Drop a teaspoon or tablespoon of filling, depending on the size, into the center of our circle. Then place another circle on top of the filing and close it by sealing the edges with a fork.

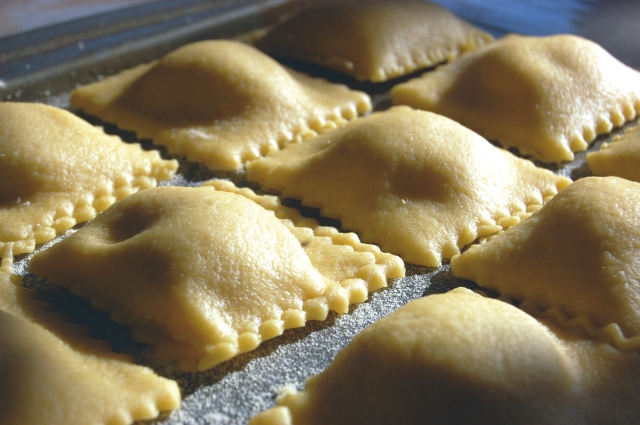
Your ravioli will look something like this:

DSC_0291 Let the ravioli rest for one hour minimum before cooking. When ready to cook, drop into a salted, boiling pot of water 7-10 ravioli at a time. when the ravioli are done, they will float to the top. They cook in 2-4 minutes.

For the Brown Butter Sage Sauce: Render the far from 6 slices of bacon, if desired. Once, brown remove form pan and set aside. Brown butter in a medium sized pan. To brown butter, you simply drop it in a pan on medium heat and stir constantly, but not crazy- just enough to keep your eye on it. As the butter browns it will bubble and foam. Once browned, add in pumpkin seeds, sage, salt, and pepper. Remember those garlic cloves you roasted earlier? Remove the cloves from that weird papery thing (clearly I’m not a professional), and add it to the sauce. Cook for about 15 minutes. It will get super thick and start to stick to the pan. Deglaze the pan with chicken stock and cook for another 10 minutes. Add more chicken stock, if needed. Then drizzle on top of the ravioli. and sprinkle with craisen and bacon which is optional.

DSC_0330

As complicated as this recipe seems, it really isn’t. it’s all about time management. While the pumpkin in roasting, start on your pasta. While the pasta is resting make your filling and let it rest. Then form your ravioli. While they’re finishing resting, start of the sauce and BAM! Pumpkin Ravioli.

DSC_0337 Sweet, sweet pumpkin ravioli. How I love you so.

To make this vegetarian, leave out the bacon and substitute the chicken stock for vegetable stock.

DSC_0339

Posted in Uncategorized | 1 Comment

Southern Style Shrimp with Cheese Grits

My absence has been for a good reason- in my mind. In my last post, I mentioned that my favorite Airman Josh was to be home for a two-week stint. My time was better spent enjoying his company than typing on the computer. But now he’s back in Florida so I am back with a ton of new recipes.

Before Josh came home, I wanted to perfect a recipe for our new favorite food- Cheese grits. More specifically, the Grits a Ya Ya from our favorite Pensacola, FL restaurant Atlas Oyster House. Not only did I recreate a dead-ringer for my Ya Ya love- I opened up Pandora’s box. And by Pandora’s box, I mean, I need to buy new pants because my waist-line is in for a rude awakening.

DSC_0099 This recipe is for the fearless. Not because it is difficult to make, but because it is truly scary how much cream and butter is in this recipe, which is why it is so good. It’s velvet on velvet. Creamy gruyere cheese grits smothered with velvety smooth Ya Ya sauce an topped with lemon and green onion shrimp. It’s just insane.

DSC_0051 You are probably wondering; what is Ya Ya sauce and why does this lady talking about it? It’s basically a thinner white gravy, but where traditional Southern white gray is made with sausage, milk, flour, and heavy on the pepper, Ya Ya sauce starts with bacon fat. That’s right. And did I mention that the grits begin that way too? But we’ll get to that later. Back to the sauce.

DSC_0080 Ya Ya Sauce begins by rendering the fat from 4 slices of bacon that have been diced into 1-inch pieces. Once the bacon is crisp, remove it and add butter to saute mushrooms, shallots, garlic, and spinach. Then you hit em’ with a splash of white wine, add your bacon and and half and half and wait for it to thicken up. There are a few other steps in between, but you can see why I’m completely obsessed with it. It’s just about all my favorite things wrapped into one thick delicious sauce. It’s missing coffee and chocolate, but as much as i love the two, they’d be the uninvited party guests to this Ya Ya bash.

DSC_0087 When Josh and I first  tried the Grits a Ya Ya, neither of us talked. We just looked at each other and literally could not believe how good it was. People always talk about Southern comfort food being the epitome of American dining, but this truly is Southern love in a bowl. If nothing else, Josh will be keeping me around as long as I know how to make this recipe.

DSC_0096

Southern Shrimp Cheese Grits with Ya Ya Sauce

Ingredients for the Cheese Grits:
8 Slices of applewood-smoked bacon
1 Quart chicken stock
1 Cup heavy cream
1-2 Cups whole milk (depending on how thick you like your grits)
2 Cups Grits (Do not use instant grits. I used Bob’s Red Mill Polenta Corn Grits)
1/2 Cup butter
1/2 Pound shredded gouda cheese
1/2 Cup grated parmesan cheese

Ingredients for the Ya Ya Sauce:
4 Strips applewood-smoked bacon
2 Cloves garlic, minced
1 Large shallot, minced
3 Tablespoons butter
3 Tablespoons olive oil
1/2 Cup (+ 8oz for the chef) white wine
1 Cup sliced portobello mushroom
2 Cups julienne fresh spinach leaves
2 Cups half and half
Salt, pepper, and hot sauce to taste

Ingredients for the Shrimp:
3 Tablespoons olive oil
1 Pound cleaned shrimp
Juice of 2 lemons
3-4 Scallions diced
Salt and pepper

Directions for the Cheese Grits: In a medium sized pot, render the fat of 8 slices of bacon that has ben chopped into 1 inch pieces. Once crispy, remove the bacon. Add the chicken stock to a boil. Once boiling, add your grits and stir like constantly until it thicken up. Then, add in half and half. Reduce to simmer and stir occasionally, adding in milk as you go to suit your preferred thickness. Let cook for 40 minutes. Then add in butter and cheeses and stir until everything is combined. While the grits is cooking, begin on your Ya Ya Sauce and Shrimp. the bacon you removed from the pan will be added to the Ya Ya Sauce.

Direction for the Shrimp: Preheat oven to 375 degrees fahrenheit. In a boil, add shrimp, lemon juice, salt, pepper, and scallions and massage until all the shrimp of coated. Arrange shrimp on a baking sheet and drizzle with remaining liquid and scallions. Bake for 15-20 minutes, just until the shrimp turn pink. 

Directions for the Ya Ya Sauce: In a medium size sauce pan, render the fat form 4 slices of bacon. Once crispy remove from pan and put it aside with the crispy bacon from the grits. Then add butter  and olive oil and caramelize the mushrooms and shallots on medium-low heat. Then, add in garlic and cook for 20 seconds. Add in your white wine to de-glaze the pan. Then, add in half and half. Once it just begins to boil, turn heat to low and add in julienned spinach and bacon. Cook for about 20 minutes until it thickens up. Add salt, pepper, and hot sauce to taste. I typically only to 4-5 dashes of hot sauce.

Assemble: Add your grits in a bowl, smother it with Ya Ya Sauce and decorate with some shrimp. Serious Southern cooking, seriously good.

DSC_0097 If you’ve never had grits, if you’ve never been down to the deep South, if you couldn’t imagine eating anything with this much butter and cream. I beg, you, give this recipe a try. Your mind will be blown! And so will your pant buttons…. but that’s why they have gyms. Life is balanced like that.

Posted in Uncategorized | 2 Comments

Pumpkin Cinnamon Rolls… Did I Stutter?

Tuesday marks October first and I am more than happy to beat October to the punch by eating more pumpkin things than anyone else on planet Earth. Last weekend I ran into an old high school friend who said she couldn’t drink a Starbucks Pumpkin Spice Latte until October- to which I pondered on my gluttonous PSL intake since August. I have no regrets.

DSC_0104 Pumpkin is just one of those comforting fall flavors that you just wanna curl up in and fall asleep. It’s spicy and sweet, and with enough bacon, even savory. (Sorry, no bacon in this entry).  Last October, my boyfriend Josh was preparing to leave to United Stated Air Force Basic Training. Much of my time then was spent ignoring the situation by feeding him pumpkin pancakes, coffee, cheesecake, literally anything I knew he wasn’t going to be eating while he was away. It must be the Italian in me, but I’m not happy unless I’m feeding people.

Page_1 In one week, my dear boy will be home for two weeks so I am preparing with some new pumpkin recipes. I was thinking back to when I visited him in San Antonio for his Basic Training Graduation. We went to this Diner called LuLu’s, which was featured on Food Network for it’s 3 lb cinnamon bun. Literally… look at the size of this bun. (Side note: Josh, RELAX, you should feel honored. The only other “person” to make it onto the blog has been the Daisy, the dog.)

IMG_0815

How big is that bun? It really is true what they say, everything really is bigger in Texas.

DSC_0065 What better way to welcome Josh back home than with some warm, homemade Pumpkin Cinnamon Rolls? Though, mine are on the more regulation cinnamon roll size. My Pumpkin Cinnamon Rolls are brushed with bourbon syrup and sprinkled with a cocktail of spices before being wrapped up into a long log, cut into 1 inch slices, and left to rise before being baked off. Oh, and brushed with butter. Because I can’t help myself, I topped the rolls off with caramel icing, leftover bourbon syrup, and candied pecans. If these rolls don’t scream, “WOW you literally have the best woman on planet Earth and should come home more often” then I don’t know what does! Well… maybe the Bacon Bourbon Cupcakes from my last entry have the same message.

DSC_0068 Some people find Cinnamon Rolls intimidating because they can be finicky and I used to agree. Anything with yeast used to scare me into thinking I was heading into an imminent cave of doom, not to mention the wrong kind of chewy, dense bready hell. But this recipe is easy peasy! Just remember, be patient and pay attention! That yeasty taste that we all know too well and hate happens when you leave the dough to rise for too long. When working with yeast, remember, yeast is not a fine wine. When it peaks, you gotta move. Don’t worry, I timed it all out for you.

Pumpkin Cinnamon Rolls with Bourbon & Caramel Icing

Don’t be intimidated by the long list of ingredients. It’s repetitive, just broken down to make it easier to track. This is a VERY SIMPLE recipe that will impress all.

Ingredients, for the Dough:
2 1/4 Teaspoons, or one packet, of Dry Active Yeast
1/4 Cup warm water, NOT hot water
1/3 Cup whole milk
2 Tablespoons butter
1/2 Cup pumpkin puree
3 Tablespoons white sugar
2 Teaspoons cinnamon
1/2 Teaspoon nutmeg
1/4 Teaspoon ground ginger
1/4 teaspoon ground cloves, I get generous with the clove because it is my FAVORITE spice
1/2 teaspoon salt
1 egg, beaten
2 Cups bread flour, using bread flour will ensure a lighter, softer roll

Ingredients for the Bourbon Syrup:
1 Cup bourbon
2 Tablespoons butter
2 Tablespoons Dark Brown Sugar
1 1/2 Tablespoons pure maple syrup

Ingredients for the Spice filling:
1/2 + 2 Tablespoons dark brown sugar
2 Teaspoons ground cinnamon
1/4 Teaspoon nutmeg

Ingredients for the Caramel Frosting:
1/4 Cup butter
1/2 Cup packed dark brown sugar
2 Tablespoons whole milk
1/2 Teaspoon vanilla
1/4 teaspoon cinnamon
Dash nutmeg
Dash salt
3/4 Cup powdered sugar

Ingredients for the Candied Pecans: 
1 1/2 Cups pecans
1/2 Teaspoon cinnamon
1/4 Teaspoon nutmeg
1 1/2 Tablespoons dark brown sugar
1 Tablespoon Pure Maple Syrup
1/2 Teaspoon salt

Directions for the Dough: Proof the yeast by combining the yeast and the warm water. Mix with a fork until the yeast just dissolved. Then, let proof for 5-10 minutes. When it is fully proofed, it will have doubled in size and formed a thick coat of bubbles and foam. Meanwhile, melt 2 tablespoons of butter and milk in a small saucepan. Let cool for a few minutes. In an electric mixer, combine the pumpkin puree, sugar, cinnamon, nutmeg, ground ginger, cloves, and salt. Once combined, beat in an egg. Then, add in your proofed yeast. On a medium-low speed, mix in your bread flour 1/2 cup at a time. Once all the flour is in the bowl, mix on low speed for about 3 minutes. It will be a soft, gooey dough. Do not get nervous if it looks too “loose.” I promise you’re doing it right! Then, you want to place the dough in a lightly greased bowl. Place the dough in a dark, warm place to rise for 1 hour. While the dough is rising, now is the time to get started on your bourbon syrup, caramel icing, and candied pecans.

Directions for the Bourbon Syrup: In a saucepan, bring bourbon, butter, dark brown sugar, and maple syrup to a boil. Then turn to low heat and let reduce for about 40 minutes until it thickens up. Turn off heat. As it cools it will thicken.

Directions for the Caramel Syrup: Brown the butter in a medium saucepan. Then, add in brown sugar and milk until it is all melted, about 1-3 minutes. Then, remove from heat and add in vanilla, cinnamon, nutmeg, and salt. When it is all mixed together, add in the powdered sugar. As it cools, it will thicken slightly, but you want it to be a little on the thin side. If you add too much powdered sugar, it will form a frosting.

Directions for the Candied Pecans: Preheat the oven to 400 degree Fahrenheit. On a small buttered baking sheet, mix pecans with dark brown sugar, maple syrup, cinnamon, nutmeg, and salt until all the nuts are covered. The bake for 10-15 minutes until just brown and toasty. Let cool completely.

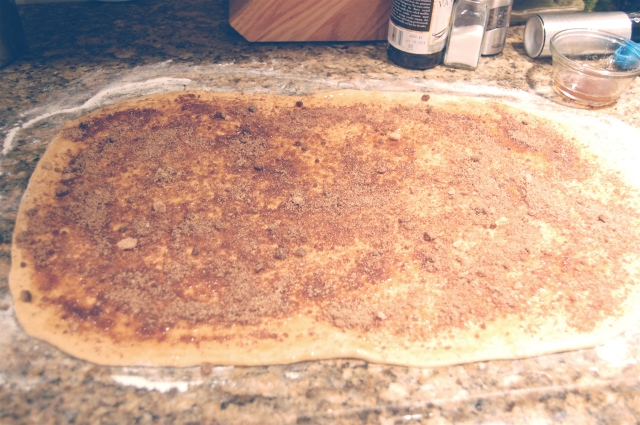
BACK TO THE DOUGH: Now that your dough has risen, roll out to a rectangle shape thing. I’m not looking for perfection. This is what mine looked like. Does that look like a perfect angle to you?

DSC_0038 In a separate bowl, mix together the dark brown sugar, cinnamon, and nutmeg. Once your dough is rolled out, brush it with the bourbon syrup, but saving some to drizzle on top later on. then, rub the brown sugar mixture to your dough. It will look like this.

DSC_0048 Then, gently roll your dough into a long log, like a jelly roll. Prepare a generously buttered  11×17 baking pan. Cut the log into 1 inch slices and place in the pan. Once your log is sliced and placed into the pan, cover and let rise again for 45 minutes in a dark, warm place. During this time, heat oven to 350 degreed fahrenheit. Once the rolls are doubled in size. Melt 2 tablespoons of butter and brush the tops of the rolls with butter and bake for 20-25 minutes.

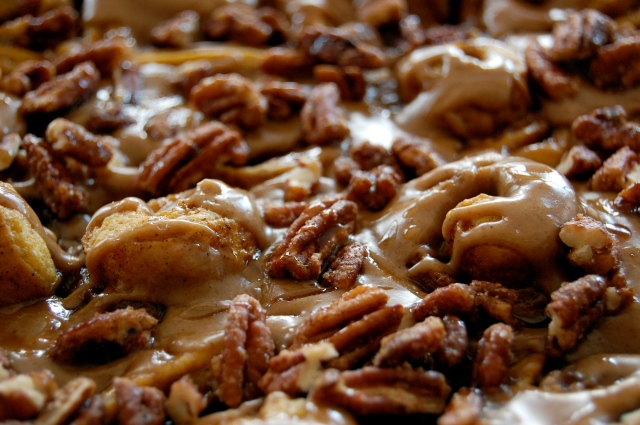
Assemble: While the Cinnamon rolls are warm, drizzle with the caramel icing and bourbon syrup and embellish those rolls with the candied pecans. Let cool for 15 minutes before serving.

DSC_0072 How can you say no to these pumpkin rolls of sweet, sweet love? I mean, you just can’t. Even if you’ve never worked with yeast, or have had cinnamon roll nightmares, if you follow these steps, you will be eating these rolls in about 2 1/2-3 hours.


Posted in Uncategorized | 3 Comments